Baby's First Diaper Change
Baby's First Diaper Change Essentials
What are the essential steps to follow during a baby's first diaper change?
During a baby's first diaper change:
- first lay out your supplies
- gently clean the baby's diaper area with baby wipes or a damp cloth
- apply diaper cream if needed
- then put on a fresh diaper.
Secure it snugly but not too tight to avoid leaks and ensure your baby's comfort.
Key Highlights
Preparing for a baby's first diaper change is essential to ensure a smooth and stress-free experience for both the baby and the caregiver. Having all the necessary supplies within reach and following a step-by-step approach will help in making the process efficient and comfortable. Remember to handle your baby gently and maintain a calm demeanour to create a positive bonding moment during this routine task.
In the world of parenting, one of the first stepping stones caregivers encounter is a baby's first diaper change. It's a delicate dance of preparation, precision, and care to ensure both the baby's comfort and hygiene are maintained. With the right essentials at hand and a gentle touch, this routine task can become a moment of bonding and connection between caregiver and baby. As caregivers navigate through each step with attention to detail and tenderness, they set the foundation for many more moments of care and love in the journey ahead.
When to See a Pediatrician

When it comes to your baby's first diaper change, most parents feel a bit overwhelmed and unsure. It's common for new parents to have questions or concerns about their baby's health and well-being during this time. If you notice anything unusual during your baby's first diaper change, such as abnormal stool colour or consistency, rash, or signs of discomfort, it's always best to consult a pediatrician. Your pediatrician can provide you with guidance on proper diapering techniques, address any concerns you may have, and ensure your baby is healthy and thriving in those early days.
See a Pediatrician
- Changing your baby's diaper can seem, but with the right essentials and steps, you'll become a pro in no time.
- Preparing a dedicated changing area with all the necessary supplies is key to a smooth diaper-changing experience.
- Understanding the basics of diapering, such as cleaning your baby's bottom and recognizing a wet diaper, is essential for a successful diaper change.
- Having the essential supplies for the first diaper change, including a diaper pail, plastic bags, baby powder, and diaper rash cream, will ensure you're well-prepared.
- Following a step-by-step guide to diaper changing, from setting up your changing station to safely lifting your baby, will make the process easier and more efficient.
- Applying diaper rash cream and placing a clean diaper properly are important steps to keep your baby comfortable and prevent diaper rash.
Introduction
Embarking on the journey of baby care involves numerous new experiences, one of the first being the baby's initial diaper change. This pivotal moment marks the start of regular diapering routines and provides an opportunity for caregivers to bond with their newborn. Understanding the basics of diapering, preparing a well-equipped changing station, and mastering proper cleaning techniques with the help of a doula are essential steps in ensuring a smooth and comfortable diaper change experience for both the baby and the caregiver.
Baby Poop From Meconium to Transitional Stools

Baby poop transitions from meconium, a sticky tar-like substance in the first few days, to transitional stools as feeding progresses. These changes in stool consistency and colour can indicate the baby's health and development. Consulting with a pediatrician can provide valuable insights into your baby's digestive system and overall well-being during these early stages. Understanding and monitoring your baby's poop is an integral part of thriving in those early days of parenthood.
Meconium: Your Baby's First Stool
See our mini-article: Meconium
The arrival of meconium, your baby's first stool, signifies the beginning of a series of diaper changes that will become a familiar routine in your parenting journey. Meconium, with its dark, sticky texture, may seem daunting at first but serves as a natural occurrence as your newborn's digestive system adapts to life outside the womb.
As you navigate through this phase, remember that arming yourself with essentials like gentle wipes, diaper rash cream, and a comforting touch can transform each diaper change into a moment of care and connection with your
Diapering Your Newborn

Diapering your newborn can seem daunting at first, but with the right approach, you'll feel like a pro in no time. Remember to have all your supplies within reach, gently clean their diaper area, apply any needed cream, and carefully fasten a fresh diaper. Keeping them comfortable and dry is key to a happy baby and a stress-free parent.
Preparing for Your Baby's First Diaper Change
Before embarking on your baby's first diaper change, ensure your changing station is well-equipped with essential supplies like clean diapers, wipes, and diaper cream. Familiarize yourself with the basics of diapering, from properly lifting your baby to cleaning their diaper area. Setting up a comfortable and safe changing spot can make the process smoother. Remember to have a plastic bag or diaper pail nearby for easy disposal of the dirty diaper and baby's poop. Being prepared will help you navigate this new experience with confidence and ease.
Understanding the Basics of Diapering
Ensure you gently lift your baby, and place them onto the diapering surface. Open the dirty diaper and wipe the diaper area with a gentle cleanser. Lift your baby's legs to fully clean and dry the folds of their skin. Applying diaper cream can help prevent diaper rash. Secure a clean diaper under your baby, ensuring a snug fit to avoid leaks. Dispose of the soiled diaper appropriately before dressing your baby.
Essential Supplies for the First Change
Clean diaper, diaper cream, wipes, and a changing pad are essential supplies for your baby's first diaper change. Having a diaper pail or a plastic bag handy for the disposal of the dirty diaper is also crucial. Along with these diapering essentials, make sure you have a dedicated space for changing diapers stocked with everything you’ll need to change your baby’s diaper. Here are the essential supplies you’ll need for the first change:
A Beginner's Guide to Diaper Changing
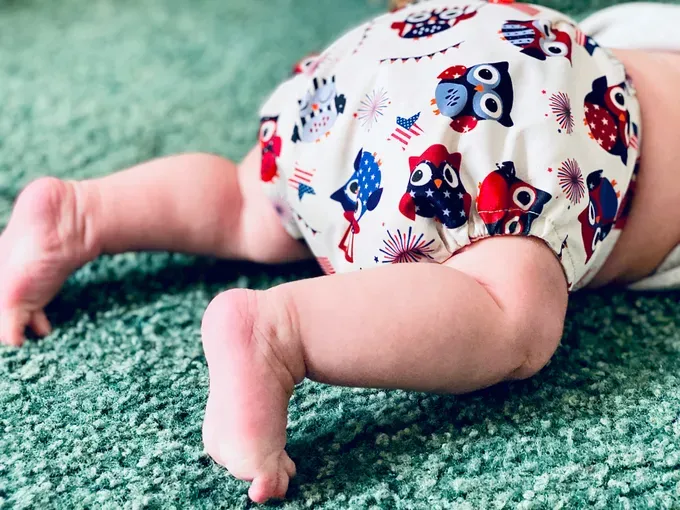
Starting with a clean diaper area is crucial for a successful change. Lay your baby on a changing pad on a flat surface, ensuring it's secure. Gently lift your little one's legs while supporting their lower back. Use wipes to clean the baby's diaper area, wiping from front to back for girls and cleaning baby boys thoroughly. Apply diaper cream if needed, and dispose of the dirty diaper hygienically. Remember, practice makes perfect in mastering the art of diaper changing.
Step 1: Setting Up Your Changing Station
Ensure your changing station is well-equipped, with diapers, wipes, and diaper cream within arm's reach. Lay out a clean diapering pad on the changing table to provide a comfortable surface for your baby. Have a plastic bag or diaper pail nearby for easy disposal of dirty diapers. Keep a washcloth and warm water handy for cleaning. Organize everything in a convenient manner, so you can focus on your baby during the diaper change in your baby's nursery.
Step 2: How to Safely Lift Your Baby
To safely lift your baby during a diaper change, slide one hand beneath their lower back and gently grasp the thighs to lift their bottom off the changing surface. Use your other hand to support their upper back and head. Ensure a secure grip and maintain eye contact with your baby throughout the process. Always lift in a smooth and controlled motion to avoid any sudden movements that could startle or discomfort your little one. Remember, your baby's safety and comfort are the top priorities.
Step 3: Removing the Dirty Diaper
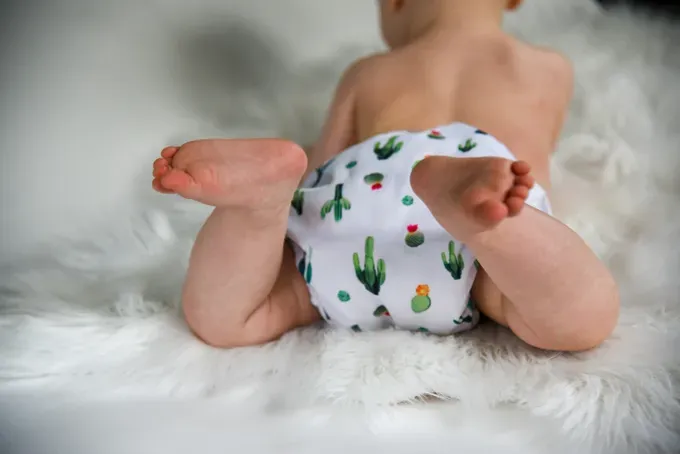 To remove the dirty diaper, gently lift your baby’s legs by supporting their baby's ankles and place a fresh diaper underneath. Use the front of the diaper to wipe away any stool or urine from your baby's bottom. Avoid wiping repeatedly to prevent irritation. Secure the tabs of the soiled diaper to contain the mess before disposing of it in a diaper pail or plastic bag. Remember to clean your baby's diaper area thoroughly using a washcloth or wipes, ensuring no residue is left behind.
Step 4: Cleaning Your Baby
Using a warm washcloth or baby wipes, gently clean your baby's diaper area, wiping from front to back to prevent infections. For girls, ensure you clean between the folds of skin. For boys, be cautious around the tip of the penis and baby's bottom. Take care to thoroughly clean any poop or urine, and pat the area dry before putting on a fresh diaper. This step is crucial in maintaining your baby's skin health and preventing diaper rash. Remember to handle your baby gently throughout.
Step 5: Applying Diaper Rash Cream
Before putting on a fresh diaper, gently apply a thin layer of diaper rash cream to your baby's bottom. This protective barrier helps prevent skin irritation and soothes any existing redness. Be sure to cover the entire diaper area, including skin folds, using a clean diaper or your fingertips. Remember not to rub the cream harshly; a gentle application is all that's needed to keep your baby's skin healthy and happy. If needed, make sure to check that the baby’s skin is healthy and not red or irritated before applying the diaper cream. To prevent irritation, make sure his skin is thoroughly clean after each diaper change. Choose a cream recommended by your pediatrician for the best results.
Step 6: Placing a New Diaper
After meticulously cleaning your baby's diaper area, gently slide a fresh diaper beneath them. Ensure the back of the diaper aligns with their waistline and bring the front up between their legs. For boys, point their penis downwards to avoid leaks from the top of the diaper. Smooth out any wrinkles and fasten the tabs snugly but not too tight around their waist. Double-check the fit to prevent any potential discomfort. Once the new diaper is securely on, dispose of the soiled one properly.
Tips for a Smooth Diaper Change
Changing your baby's diaper doesn't have to be a stressful experience. With a few tips, you can make diaper changes quick and efficient. One tip is to have all the essentials within reach before you start, including diapers, wipes, a changing pad, and diaper cream. Another tip is to use quick fixes for common challenges like blowouts and leaks. For example, using a cloth diaper insert or a diaper cover can help prevent leaks. Additionally, keeping your baby entertained during diaper changes can make the process more enjoyable. Singing a song, playing peek-a-boo, or giving them a toy to hold can help distract them and keep them engaged, especially during a poopy diaper change.
Quick Fixes for Common Challenges
Blowouts and leaks are common challenges that parents face during diaper changes. To prevent blowouts, make sure the diaper is snug around your baby's waist and legs. You can also use a cloth diaper insert or a diaper cover for added protection. If your baby experiences diaper rash, applying a diaper cream or ointment recommended by your baby’s healthcare provider can provide relief and help prevent further irritation. Look for a diaper cream that contains zinc oxide, which can soothe and protect your baby's skin. Another helpful tool is a wetness indicator, which changes colour when your baby's diaper is wet. This can help you determine when it's time for a diaper change, preventing leaks and discomfort for your little one.
Keeping Your Baby Entertained During Changes
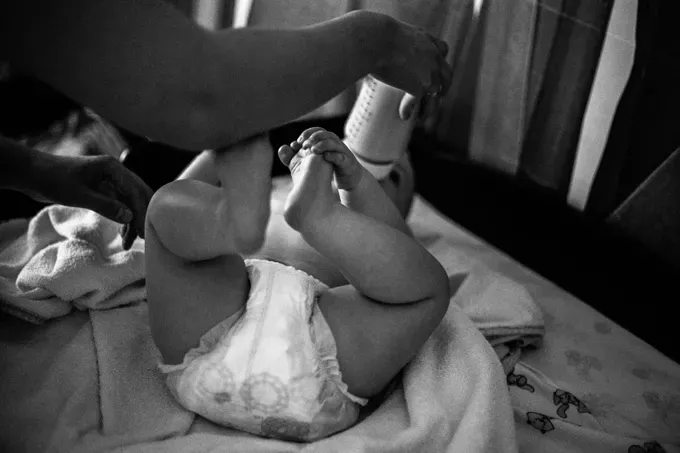
Diaper changes can sometimes be a struggle, especially as your baby becomes more active and mobile. Keeping your baby entertained during changes can make the process easier for both of you. One way to do this is by using soothing techniques. Singing a favourite song, playing soft music, or using a calming voice can help relax your baby during diaper changes. You can also provide a toy or a small object for them to hold and explore. Talking to your baby and explaining what you're doing can also help keep them engaged and distracted. Remember to always supervise your baby during diaper changes and ensure their safety and comfort.
Understanding Diaper Sizes and Types

Understanding diaper sizes and types is essential for choosing the right diaper for your baby. Disposable diapers are the most common type and come in various sizes to accommodate your baby's growth. Cloth diapers are another option and are more environmentally friendly. They require more maintenance but can be cost-effective in the long run. When it comes to diaper sizes, it's important to consider your baby's weight and age. Diaper sizes typically range from newborn to toddler, and switching to a larger size is necessary as your baby grows.
Choosing the Right Diaper for Your Baby
Choosing the right diaper for your baby involves considering their age, size, and specific needs. For newborns, diapers with a cut-out for the umbilical cord stump can be helpful. As your baby grows, you'll need to switch to larger sizes to ensure a proper fit. Selecting diapers with stretchy waistbands and adjustable tabs can provide a snug and comfortable fit for your little one. When your child reaches the toddler stage, you may consider transitioning to training pants or pull-up diapers, which allow for easier potty training. It's important to remember that every baby is different, so finding the right diaper may involve some trial and error.
When to Switch Diaper Sizes
Knowing when to switch diaper sizes is crucial for your baby's comfort and to prevent leaks. A good rule of thumb is to switch to a larger size when the current diaper becomes too tight or when there are frequent leaks. Pay attention to your baby's weight and the fit of the diaper. If the tabs are consistently overlapping or the diaper leaves marks on your baby's skin, it's time to move up to the next size. Additionally, if your baby is experiencing discomfort or their diaper is constantly sagging, it may be an indication that a larger size is needed. Remember to check the diaper size chart provided by the manufacturer for guidance.
Managing Diaper Rash and Sensitive Skin
Diaper rash is a common concern for parents, but with proper care and prevention, it can be managed effectively. Taking preventative measures such as frequent diaper changes, using a barrier cream or ointment, and keeping the diaper area clean and dry can help prevent diaper rash. It's important to choose a diaper cream that is gentle and safe for your baby's sensitive skin. Look for creams that contain zinc oxide, which can provide a protective barrier against moisture and irritants. If diaper rash persists or becomes severe, it's always a good idea to consult a pediatrician for further guidance and treatment options.
Preventative Measures for Diaper Rash
Preventing diaper rash involves taking proactive measures to keep your baby's diaper area clean and dry. One important step is to change your baby's diaper frequently, especially after bowel movements or when the diaper is wet. This helps reduce the exposure of your baby's skin to irritants. Additionally, using a barrier cream or ointment can provide a protective layer between your baby's skin and the diaper. Look for creams that contain ingredients like zinc oxide or petroleum jelly. It's also important to ensure that you're using gentle wipes or clean water to clean your baby's bottom during diaper changes. Avoid using harsh soaps or wipes that contain alcohol or fragrance, as they can further irritate your baby's sensitive skin.
When to Consult a Pediatrician
While most cases of diaper rash can be treated at home with preventative measures and over-the-counter creams, there are instances when it's necessary to consult a pediatrician. If your baby's diaper rash doesn't improve within a few days or becomes worse, it's a good idea to seek medical advice. Additionally, if you notice any signs of infection such as pus-filled blisters, fever, or excessive redness and swelling, it's important to consult a healthcare professional. In some cases, diaper rash can be a symptom of an underlying condition like a urinary tract infection or a yeast infection. A persistent or recurrent rash may also require further evaluation and treatment from a pediatrician.
Conclusion
Changing your baby's diaper can seem overwhelming, but with the right knowledge and essentials, you can handle it like a pro. From setting up the changing station to choosing the right diaper size, this guide covers everything you need for your baby's first diaper change. Remember, ensuring your baby's comfort and hygiene is key. With preventative measures for diaper rash and tips for smooth changes, you'll navigate this task with ease. Embrace each diaper change as an opportunity for bonding and care, making it a positive experience for both you and your little one.
Frequently Asked Questions
How often should I change my baby's diaper?
The general rule-of-thumb for changing a baby's diaper is every 2-3 hours or when it becomes soiled. In the early weeks and months, it's recommended to change the diaper after each feeding, as babies tend to eat every two to three hours. Additionally, it's important to change your baby's diaper promptly after a bowel movement to prevent diaper rash and discomfort.
Can diaper changes affect my baby's sleep?
Diaper changes can affect a baby's sleep, especially if they are easily woken up by the disruption. Establishing a nighttime routine that includes a quiet activity before bedtime can help your baby relax and fall back to sleep more easily after a diaper change. Creating a calm and soothing environment with soft lighting can also promote your baby's comfort during these nighttime diaper changes.
What are the signs of a too-tight diaper?

A too-tight diaper can cause discomfort and irritation to your baby's delicate skin. Signs of a too-tight diaper include red marks or indentations on the baby's skin, increased fussiness or irritability during diaper changes, and the appearance of diaper marks on the baby's thighs or waist. It's important to ensure diaper isn't too tight to avoid these issues.
How can I make diaper changes easier at night?
Nighttime diaper changes can be made easier by keeping the environment calm and soothing. Engaging in quiet activities, such as singing a lullaby or reading a bedtime story, can help relax your baby and prepare them for sleep. Soft lighting, such as a night light, can also create a peaceful atmosphere during nighttime diaper changes.
Is it necessary to use powder at every diaper change?
Using powder at every diaper change is not necessary and may even be harmful to your baby's health. Baby powder can create a cloud of fine particles that can be inhaled by the baby, leading to potential lung irritation or respiratory issues. It's best to avoid using baby powder, especially if your baby has sensitive skin or is prone to diaper rash. Instead, focus on keeping the diaper area clean and dry to prevent moisture-related skin issues.
Tips for on-the-go diaper changes
When it comes to on-the-go diaper changes, being prepared is key. Make sure to have a well-stocked diaper bag with all the essentials, including diapers, wipes, diaper cream, and a portable changing pad. It's also helpful to have extra clothes and plastic bags for soiled diapers. Familiarize yourself with diaper changing facilities in public places and be prepared to handle diaper changes in various settings.
References:
https://kidshealth.org/en/parents/diapering.html
https://directory.trihealthpho.com/provider/Micah+Steven+Resnick/2165274
https://www.healthychildren.org/English/tips-tools/symptom-checker/Pages/symptomviewer.aspx
https://www.healthychildren.org/English/ages-stages/baby/diapers-clothing/Pages/A-Word-on-Wipes.aspx
https://www.healthychildren.org/English/ages-stages/baby/diapers-clothing/Pages/Diaper-Rash.aspx


