
Summer Baby Launch: Due MaY 21 to August 31, 2026
Your Baby Is Already Listening
What if the first story your child hears features their name. What if every bedtime builds brain connections that last a lifetime. Literacy begins before birth. It begins with your voice, in stories made just for your baby.
First prenatal books ship in early 2026.
Evidence-based literacy. Personalized magic for your Summer 2026 baby.
Inform: Choose Your Reading Journey
Three Ways To Build Your Baby's Library
Each subscription sends personalized stories from prenatal through early childhood. Each plan supports hospital-based literacy for another child.
Reserve now for babies due March 21 to August 31, 2026.
The Six Skills That Predict Reading Success
Every book in your subscription works on six early literacy skills. The design follows the science behind how babies and toddlers learn to love print.
- Print Motivation: Your child feels delight and calm with books.
- Vocabulary: Rich, repeated words grow language networks.
- Print Awareness: Little hands learn how books and pages work.
- Narrative Skills: Stories build sequence, cause, and effect.
- Letter Knowledge: Playful exposure to letters and names.
- Phonological Awareness: Rhymes and rhythms tune ears to sounds.
The LearningTime model aligns with Reach Out and Read. It is currently piloting with Cincinnati Children's Hospital to extend this work into clinical care.
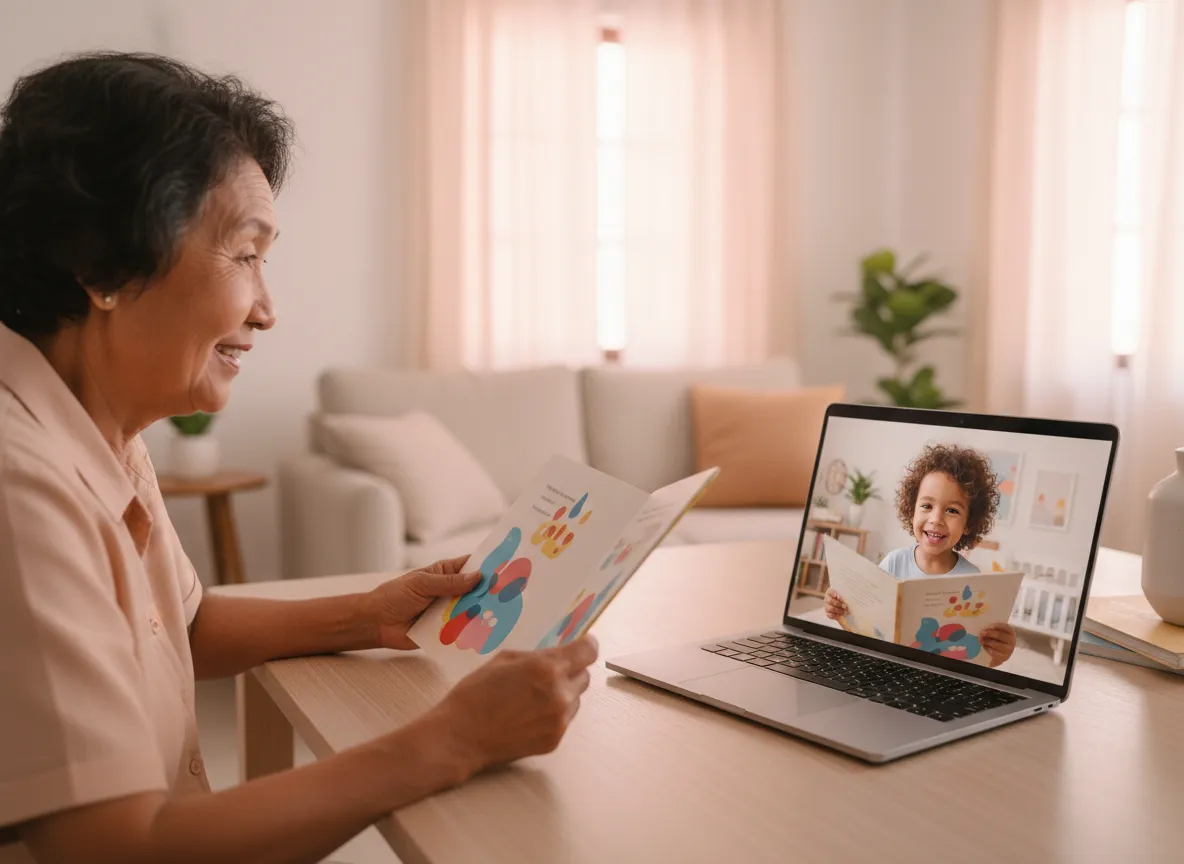
Grandparents And Great-Grandparents: Be Part Of The Story
Add a grandparent or great-grandparent edition to any subscription. Duplicate books ship to their home for 50 percent more than your base plan.
Most standard monthly books are included. Prenatal, birthday, and Welcome To The World books stay with the primary family for keepsake moments.
Grandparents read the same story miles apart. Bedtime sounds the same across homes. Rituals become shared family language that grows with your child.
Perfect for baby shower gifts and legacy builders.
Inspire: See The Future You Are Building
Your Reading Journey From Before Birth To Beginning School
Every season of early childhood brings a new kind of reading. Your subscription guides each stage with stories and prompts that match your baby's brain.
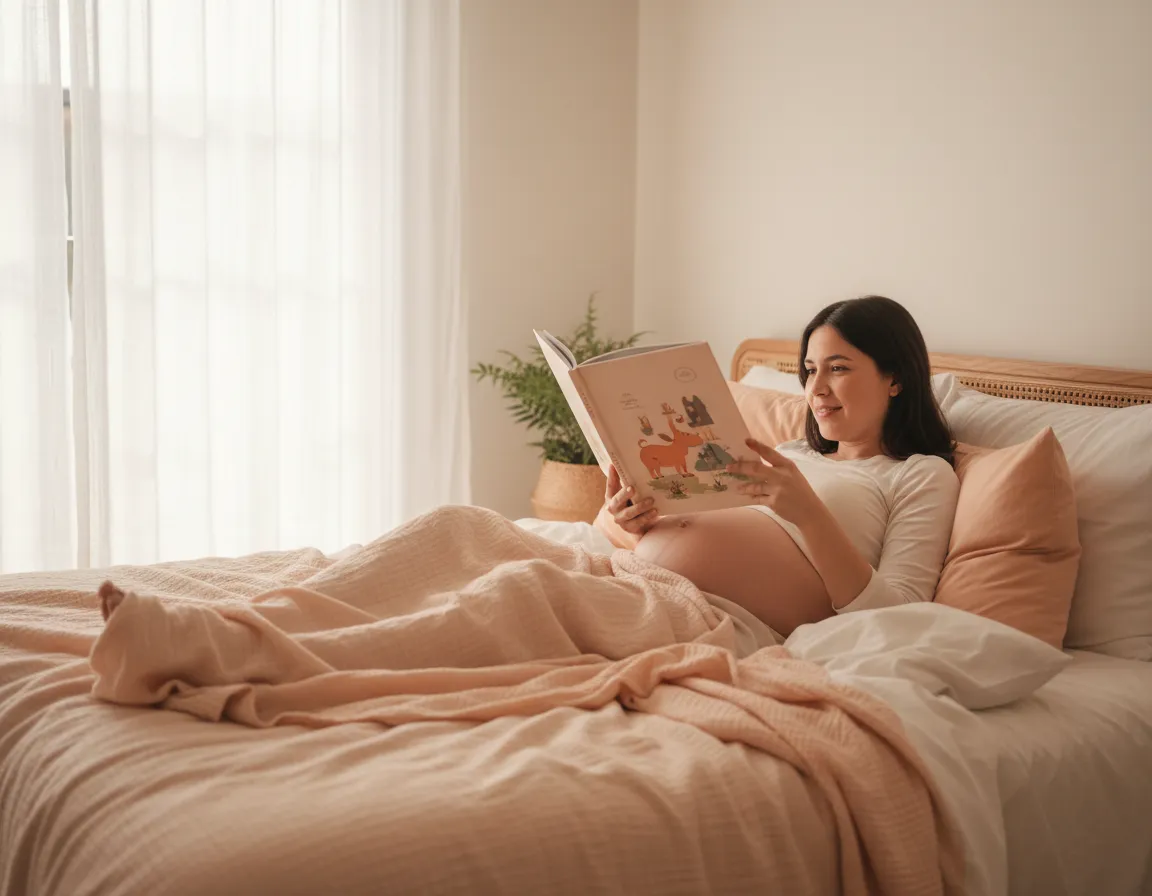
Prenatal
You read while your baby grows. Baby begins to recognize your voice, rhythm, and patterns of language. Bonding and brain wiring start before birth.
0 to 12 Months
First books arrive monthly. Baby tracks faces and pictures, hears their own name in print, and feels safe in your arms. You form a simple five minute daily ritual.
12 to 24 Months
Vocabulary grows fast. You begin interactive reading with the SHARE framework. You Comment, Ask, and Respond. Laminated prompt cards live on your coffee table.
24 to 36 Months
Pre-literacy skills become visible. Your child plays with letters, rhymes, and simple stories. Milestone tracking pages help you notice and celebrate progress.
36 to 60 Months
In extended plans, books begin to bridge into early reading. Repeated phrases, simple patterns, and familiar characters invite your child to join in. Kindergarten readiness becomes a natural next chapter, not a sudden leap.
This Is The Beginning Of A Lifetime Of Stories
Picture this scene. It is bedtime. Your child snuggles close. You open a book with their name on the cover. Their whole face brightens with recognition.
Every page builds skills. Every cuddle strengthens connection. Every night becomes your favorite five minutes of the day.
Literacy becomes love that your child can feel. Connection compounds across generations as grandparents and great-grandparents join the ritual.
Your baby arrives this summer. The story begins now.
Get your Prenatal Read Aloud now and start reading to your child before they are born. They're already listening.
Spots are limited for babies due March 21 to August 31, 2026.
Questions, Met With Science And Care
Expecting a baby and launching a reading ritual raise real questions. Here are clear answers grounded in developmental research.
When does my subscription start if my baby is due in summer 2026
You reserve your spot now. Prenatal books ship in early 2026, timed to your due date window. We confirm your final due date as you get closer so your early months align with your actual arrival.
What makes these books personalized for my baby
Your baby's name and family details become part of the narrative. Stories reflect routines like bath time, bedtime, and visits with grandparents. Personalization helps your child feel seen and increases print motivation.
How does the one for one and one for two impact work
Every Seasonal Ritual and Monthly Foundation subscription funds three years of books for a child served through our hospital partners. Every Complete Journey helps two children receive that same three year foundation.
What if reading feels hard with a newborn schedule
Your plan focuses on small moments that fit real life. Short texts, sturdy formats, and simple prompts help you read for a few minutes at a time. Five minutes with a calm voice delivers real developmental value.
Do you have any questions?

COMPANY
CUSTOMER CARE
LEGAL
FOLLOW US
Copyright 2026. LearningTime Canada. All Rights Reserved.